Showing posts with label Food Storage. Show all posts

Saturday, December 22, 2012

Tip for Preppies


Photo By SmartBoyDesigns

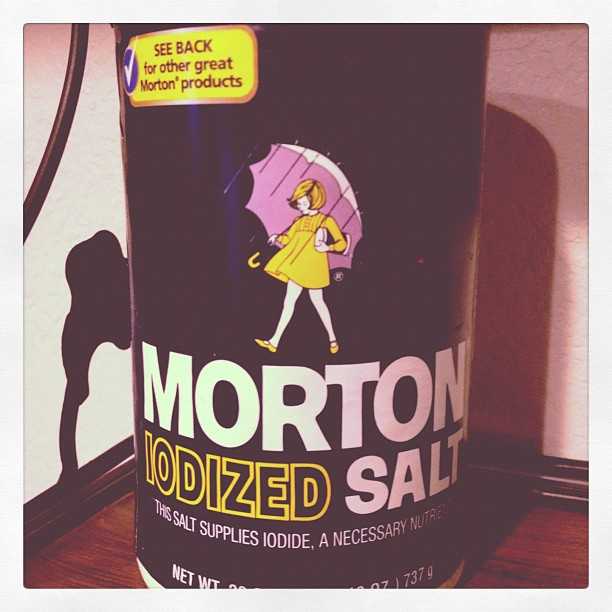
Salt. Many folks have stockpiled some salt in their prepper food lockers, hopefully iodized because iodine is SO important to health, and we get it from so few foods. However, just yesterday I discovered the iodine added to salt is fragile and dissipates rapidly, which means if the salt is more than a few months old, the iodine has virtually vanished.

This is equally important for those with thyroid problems who need the iodine, aqnd those at risk of goiter problems in the absence of iodine. Worldwide, iodine deficiency affects about two billion people and is the leading preventable cause of mental retardation. The USDA recommends a minimum of 150 mcg of iodine per day for both men and women. 

Iodine was added to salt around 1924, at the request of government initiatives, due to the growing need for regulation of iodine deficiency disorders. In the 1920′s era in the United States, the Great Lakes and Pacific Northwest region of the country experienced high incidences of goiter (a common thyroid-malfunction-based condition). This was because their soil levels were extremely low in iodine, and people weren’t eating iodine rich foods .

To be on the safe and healthy side, I suggest adding some dried kelp to your storage locker. Dried seaweeds are a good source of iodine as well as many trace minerals, and is often salty enough to use in place of salt, or with a lesser amount of salt.

I have several quart jars of seaweeds in my pantry, notably kombu (kelp), hiziki, dulse, nori (in sheets) and Wakame. Probably that's not enough to have in storage, and I live far from the coast where seaweed is easily harvested.

1 tablespoon of Kelp contains about 2000/mcg of iodine, 1 tablespoon of Arame contains about 730/mcg of iodine, 1 tablespoon of Hiziki contains about 780/mcg of iodine, 1 one inch piece of Kombu contains about 1450/mcg of iodine, 1 tablespoon of Wakame contains about 80/mcg of iodine. I recommend sprinkling them in soups or on salads.

If you have eaten a California Roll, you have eaten the seaweed called Nori. 

Nori Sheet by psd


Oarweed by La.Catholiquehttp://www.flickr.com/photos/lacatholique/6118562625/

 
Here is a whole big thicket of oarweed kombu. In OR, no license is required for personal seaweed harvesting, although there is a limit of 10 lbs per person. For WA, you must obtain a license through the WA Dept. of Fish and Wildlife. It's also important to check for closures or other health risks prior to harvesting. See this site for contacts for WA state. http://wdfw.wa.gov/fishing/shellfish/shellfish_seaweed_rules.html

Kelp Drying in the sun, by garycycles3


I happen to like Dulse a lot; it makes a slightly sweet rather than salty snack just by itself. I am out of it, and I couldn't find a decent free photo on the internet to use here. Dulse is one of the red algaes, whereas kelp is considered a brown algae.

There are many edible seaweeds. Check out Edible Seaweed here.

How to prepare and cook seaweed.

Monday, August 20, 2012

Vacuum Sealing Dry Foods in Mason Jars

Set-up to seal jars. Vacuum tube attaches to a port on top of my sealer, just behind the tubing.

I've had a vacuum sealer for several years and I love it! I bought it because I was tired of freezer-burn on the meats in the freezer, and for sealing veggies in bags to freeze... but I haven't been using of all the functions... like vacuum sealing dry goods in mason jars.

Inside of the sealing cap, and 15 bean soup mix.
Vacuum lid attached to seal jar, be sure metal jar lid is centered.

I hadn't thought much about vacuum sealing jars of purchased dried goods or home dehydrated fruits, vegetables, jerky and even mushrooms, because in my pantry they generally stay crisp, partly due to the dry heat from the furnace in winter. However, lately I cooked some stored dried beans that took forever to cook to a soft, edible stage. 

So now I'm wondering if vacuum sealing keeps moisture out, can it also keep the minimal amount of moisture (like in beans) in? It's sure worth a try since I already store most of those items in jars.

FoodSaver makes a Universal lid, but I couldn't get it to work on Rock Candy. Guess I need a wide-mouth lid sealer cap.

I'm also looking at vacuum sealing items that become rancid from exposure to oxygen, like flour and cornmeal, which I usually keep in the freezer. (One of my goals is to reduce dependence on the freezer.) Sugar and salt that are vacuum sealed won't become hard bricks either, and herbs and spices will have a much longer shelf life.

Another benefit of vacuum sealing dry goods in jars is that the lids can be re-used over and over, unlike the lids on home canned foods. For example, if you open a jar of thyme, you can take out what you need, and immediately re-seal the jar. (I just got a big bag of French Thyme from Penzey's, it's far tastier than what I grow in my garden. I'd hate for it to lose all flavor before I use it up, so it will get vacuum sealed in a pint canning jar.)


But what if there's no electricity? It's cheap and easy to make a hand cranked pump to seal jars. The pump is an automotive vacuum pump (I believe it's used to bleed brake lines), and the jar cap is made for use with electric vacuum sealers.

Wendy Dewitt has some great food storage videos on Youtube. Wendy has taught food storage for years; she's a Mormon, and the Mormon church recommends every member stores a year's supply of food. The video I watched was quite long, but she covers a lot of ground in it, including vacuum sealing jars of dried foods, where to store what, and rotation of stored goods. Her other videos are shorter segments, and more manageable if you only have a few minutes at a time to watch them.

Saturday, August 18, 2012

Stocking the Pantry

I've kept a somewhat decently stocked pantry for many years, at first because I grew up in hurricane country, and now because I live miles from any grocery stores. Actually, I live more than 2 hours from stores that carry anything more than minimal fare. So I have come to rely on my 2 freezers for any abundance from my garden, and for grass-fed meats in quantity when available and less expensive.

However, relying on freezers is always iffy. A friend just 200 miles away lost the contents of a huge chest freezer during an 8 day power outage due to a fierce summer storm. I've been fortunate that the only extended power outage I've had here happened in a freezing winter, and I lost nothing from the freezers. But I can't count on always being that lucky. If an extended power outage happened in warm weather, I'm not sure I could make a wood fire (and keep it going for days) to cook everything in my freezers before the contents spoiled. Sure couldn't use the electric stove to cook during a power outage!

To remedy reliance on my freezers, I'm going through them and beginning to can some of the meats I have stored in them. My mother always canned beef, pork and chicken, although they froze the trout they raised because it tasted more like fresh-caught when thawed and broiled later on.

Here's a little bit of the pork shoulder I canned. The liquid is from the pork itself. The venison I canned 2 days ago was already on the pantry shelves before I thought to take any photos.

Lard and Tallow, hot and just out of the canner
Lard and Tallow, after cooling. Jar on the far right is chicken schmaltz, don't know why it didn't solidify.
I'm also rendering and canning all the pork and beef fat, salt pork, bacon, and sausage patties. Rendered pork lard and beef tallow don't really need to be canned if you store it in a cool, dark place, but the heat of this summer has shown me I need to do something else. It keeps better anyway if canned, to keep out the oxygen that causes it to turn rancid.

Canned salt pork chunks. The 2 jars on the left are trotters.
More canned salt pork. The small jars have cured and smoked salt pork with some herbs added. They will be great in a mess of greens or beans.

I already have a small pantry of home canned fruits and veggies, chicken stock, jellies and such, but not much in the way of protein, so the canned meats will be a bonus insurance policy. I know beans are a decent source of protein, but my body doesn't digest then very well, so I look to meat and eggs for protein. I've canned a few soups and stews with bits of chicken or beef, but not a lot. As a treat, I always can any bits of meat left on the bones as pet food when I make stock.

I'll have a separate post on canning bacon. YUM!


Monday, November 7, 2011

Save the Leeks


Leeks ready to Blanch
I found myself with some store-bought leeks and then no time to make something tasty with them before they spoil. (They are too expensive to allow to spoil!) My freezer is full, as are the canning shelves... so I decided to dehydrate them. Invariably I will want to use leeks in a dish and not find any available in our local grocery stores. Dehydrating solves the problem of limited storage space, and lets me Save the Leeks.

Eazy-Peazy. Many who dehydrate leeks prefer to slice the leeks in half lengthwise, but I prefer whole rings. Cut off the root end, peel off the outer layer, and slice into 1/4 inch slices. When you get to green, tough outer leaves, remove another layer, and slice up to the next tough leaves.  When you have salvaged all you can, put the slices in cold running water and clean thoroughly.

Leeks are grown planted in a trench and "hilled" as they grow, blanching the stems white. In the growing process, lots of sand/dirt gets trapped in the leeks so they must be rinsed thoroughly (unless you like to eat grit).

First batch chilling

After they are well-rinsed, drop them into a pot of boiling water for 3 minutes to blanch. You may need to do them in several batches to keep the water temp from dropping with the addition of the leeks, depending on quantity of leeks you have. Remove them from boiling water with a slotted spoon and drop immediately in an ice water bath to stop the cooking.

First batch draining

After chilling for 3-4 minutes, I drained mine briefly on paper toweling before distributing on the dehydrator trays. Dehydrate at about 100ºF. How long depends on how thick you sliced them, but easily done in an afternoon.

After Dehydrating

You can rehydrate them for use later in hot water for 15 minutes; mine usually go into a dish with lots of liquid so I add them dry.


I dry mine to the crispy stage, and just store them in a glass jar with a tight-fitting lid. I check them after 24 hours... if they aren't fully dry, some moisture will appear inside the jar. If so, they go back in the dehydrator for 2 or so more hours.


Sunday, August 21, 2011

Storing Potatoes without a root cellar

I hear from folks all the time who want to store potatoes for the winter, but do not have an acceptable spot in a basement, in a crawl space or the luxury of an old root cellar. Do not despair, here's one way that's cheap and easy to do, and time to plan in most of the country! (I also have some posts on root cellaring tips coming up after Labor Day.)

There might be a name for this, but my step-father just called them a potato storage "hill" (not to be confused with the hills people make around potatoes for growing). It is actually very simple, inexpensive, and effective. All you need is straw, potatoes and some dirt.

After you have dug the potatoes, allow them to dry in the open air a couple of hours to toughen the skins. Do NOT wash them! On a spot where the potatoes grew (or some convenient spot), put down a circular layer of straw about 8" deep. Make sure the soil underneath is tamped down firmly if you dug potatoes from there. The size of the circle depends on how many potatoes to store. If there are lots, you might want to make two or more circles of straw, and have manageable amounts per hill.

Place a layer of your dry potatoes (carefully) in a circle, but be sure there is about 8-10" of straw outside the circle of potatoes. Now start to build up a cone of potatoes on the circle layer, until you are as tall as the cone will go without the potatoes tumbling down. Place a section of plastic pipe, like 1" PVC plumbing pipe down into the stack of potatoes a few inches, and extending above the stack height about 2 feet. This will bring some fresh air into the potatoes over the winter to keep them healthy.

Starting at the bottom, cover the cone of potatoes with straw at least 8-10" thick, until the entire stack is fully covered with 8" or more of straw, even the top.  Next, dig some dirt from around the cone (dig far enough away from the cone so you don't disturb the cone and straw covering, but close enough to act as a drainage ditch for winter rains or melting snow). Cover the cone of straw with dirt as thick as will hold up, the thicker the better. Pack the dirt tightly around the plastic pipe and tamp all the dirt firmly with the back of your shovel. If your soil has a lot of clay, it will form a better protective barrier against washing away in rain.

One advantage of making several smaller hills is that you can dig out several pounds of potatoes from a small hill without disturbing (and having to re-build) the other hills.

Alternative:
This method above is not the best in some parts of the US, where it is just too cold in the winter. If your winters are really severe, or you don't want to build a hill, you could accomplish the same thing with several bales of straw stacked to form a well in the center. Fill it with potatoes and other winter vegetables like squash, pumpkins and turnips, then cover with more bales to form a thick insulated storage area, and cover the whole thing with a tarp. Access is easy by merely removing a few bales, retrieving what foods you want, and re-stacking and re-covering the bales.