Monday, February 14, 2011

Coeur a la créme (Heart of Cream)


In honor of Valentine's Day, I decided to make Coeur a la créme using some of the Fromage Blanc I just made!

There are recipes for this dish all over the internet, but basically it is a flavored and sweetened dairy product. In France where it originated, the dairy is usually a Fromage Blanc, although in the US it is often made from store-bought cream cheese. Either way, it is mixed with whipped cream or stiffly beaten egg whites, and sweetened... usually with fresh fruit, fruit syrup, or sometimes chocolate. Ina Garten has a great recipe, Coeur a la Creme with Raspberry and Grand Marnier Sauce that sounds positively decadent.

I'm choosing a less opulent serving, using frozen raspberries from my garden for a raspberry sauce. And, since this is a last minute decision, I don't own "proper" Coeur a la Creme molds like these... but perhaps they will go on my wish list! Instead, my sis has a couple of large plastic cookie cutters that are heart-shaped. I think using cheesecloth inside them to contain the cheese while it firms will suffice, at least this time.

Basic Coeur a la créme recipe
(adapted from several recipes...)
1 cup fromage blanc, room temperature
Powdered sugar to taste (about a tablespoon?)
A bit of cream to thin the cheese, if necessary
2 egg whites, beaten stiff (or 2 to 2½ cups stiffly whipped heavy cream)
Optional: ¼ tsp vanilla extract, or to taste


Whip 2 egg whites to firm peaks. Mix sugar, milk or cream and cheese together well. Fold in egg whites or whipped cream. 


Fill heart-shaped molds lined with cheesecloth, place on a sheet pan and refrigerate


One important thing to do is allow some space at the bottom of the mold for the heart to continue to drain... I'm using my bamboo sushi mat between the molds and the sheet pan. I put a weight (small glass baking dish) on top of the molds before refrigerating them.


After being chilled overnight, I peeled back the cheesecloth over the top and turned them over onto a small plate. The mold and cheesecloth came off easily although the molded cheese is still rather delicate and needs to be handled carefully.


The raspberries (for a Raspberry Coulis) I thought were in the freezer must have been in my imagination and I didn't want to make a run to town, so I just opened a jar of preserves. Any sweet topping will do, and it really makes a lovely, light dessert treat! YUM!

Making Fromage Blanc

I had decided I wasn't going to make any more soft cheese for now, but put my time into mastering aged cheeses. I've made several kinds of soft cheese, but mostly from yogurt, and  none with bacterial cultures. Well, I finally came to the conclusion it is important to learn the simple things first, become proficient at them, and then build on those "learning blocks" for things with more complexity.

And as it turned out, I got an extra half gallon of fresh local milk yesterday, just the right amount to make Fromage Blanc. Besides, the description and uses for it on some Francophile pages were just too hard to resist!

While it is "just" a fresh cheese, and as common as wine in France, it's not generally available here in the US, except as imitation. One of the premier uses is as a desert, whether as a cheese tart somewhat akin to our "cheesecake" (Tarte au Fromage Blanc), or with a refreshing sweetened syrup and/or berries (Fromage Blanc au Sirop). Another use is mixed with herbs as a savory cheese spread. At any rate, I decided to make a small batch!


The recipe is quite easy: Heat ½ gallon of whole milk to between 72º-80ºF. Transfer the milk to a non-reactive container.


Add the culture... allowing it to hydrate a couple of minutes before stirring it thoroughly into the warmed milk. Each of the culture packs I bought contain 1 gram, enough for a full gallon of milk. I measured out half a gram, and returned the remainder to the packet and freezer. This starter culture contains bacteria (S. Lactis, S. Cremoris, and S.Lactus Biovar Diacetylactis) and rennet, in an inert carrier. The bacteria consumes the lactose in the milk at room temperature, and in doing so it manufactures lactic acid, giving the cheese its flavor... and increases the acidity of the cheese. The rennet in the culture coagulates the milk.


Mix thoroughly, cover and set aside at room temp for 12-24 hours. When the mass has shrunk and pulled away from the edges of the container, the coagulation is done. (It will look like a white blob floating in a sea of whey.)


Photo above is the next morning, after about 15-16 hours. I don't think it has quite coagulated enough, probably due to cool room temps.


After sitting about 4 more hours, it looked fairly thick, had lots of whey floating on top, and had pulled away from the sides of the container. Next, line a colander or strainer with fine cheesecloth (aka butter muslin) over a bowl, and pour the curds and whey into it. 


After about half the whey had drained off, I tied the cheesecloth corners together and hung it from a shelf above the bowl so it would drain better/faster.


I am collecting the whey in a clean container so I can make ricotta from it!


As I was moving the almost-empty container that I had the milk coagulating in, I fumbled it and it fell to the floor, splashing the remaining contents on the base of a mirror that was sitting there. My cat thought I spilled it just for her. CAT YUMMIES!


It is best to do the straining under refrigeration if the room is warm, as it may take some time to drain thoroughly. My room is fairly cool, and it's draining rather fast, so I'm not worried about spoilage... although I would be if it was summer!

How long to drain it depends on how you plan to use the cheese; it becomes more firm and dense the longer it drains. You should occasionally check the amount of whey drained off so the "catch" container doesn't overflow.


When it is of the consistency you want, put it in a bowl and mix in a bit of salt, to taste. A fine-milled salt like baker's salt or cheese salt incorporates nicely without leaving salty "spots" in the mix. Place in a container with a cover and refrigerate. It will keep refrigerated for a week or two. 

When you are ready, you may add herbs for a cheese spread, honey for pancake toppings, or top with fruit, syrup or jam for a simple dessert. (See my dessert, Coeur a la créme, also posting but later this morning, because of chill time.) YUM!

ps... my half gallon of milk made just a tad over a pound of fromage blanc, half of which went into the dessert.

Saturday, February 12, 2011

Food Prices Going Up... again

Photo from Myki Roventine's photostream

One of the things I simply cannot grow or make myself is coffee (unless I win the lotto and build a mega-dollar heated greenhouse!)... and coffee is supposed to increase by 10% soon. (I expect other foods will quickly follow. You'd best get your seed order placed, and your pantry re-stocked ASAP!)

We all know that coffee isn't sold in pound increments anymore; in the last few years it has been generally packaged in 12 oz. bags, rather than the old one pound cans. It took a while before everyone noticed the ratio of size to price changed back then... (Size changed, price didn't.) Two weeks ago I bought a pack of coffee without looking closely; it's what I always buy, and nothing looked different. It was the same visual size as all the other packs on the shelf, so nothing alerted me to the fact it was only 10 oz. (and the same price as the 12 oz. was a month ago) until I got it home. Grrrrrr...

I recommend you look closely at package size as well as price when shopping. More and more items visually appear to be the same quantity as before, for the same price.... but a closer look may prove that as deceiving. Meats, chicken and beer have risen recently and grains are taking a big hit. Volume pricing is generally less expensive BUT you must check the unit price... because sometimes a larger box costs more per unit.

Those of us who care about food quality are no doubt more than merely dismayed at the recent approval by the current Administration of TWO Monsanto genetically altered crops. (I prefer to think it is simply Hanlon's Razor at work, rather than a giant conspiracy of some sort to control our food.... although Henry Kissinger did say, "Control oil and you control nations; control food and you control the people."

I read in one of the news blurbs that the President said he feared there wouldn't be enough food if these crops were not allowed. So, the hungry need to be fed sugar, and alfalfa? Gimme a Break. The sugar will just increase profits made off of our already unhealthy national diet, and I'm not sure who benefits from the GMO alfalfa besides Monsanto.

Mark Bittman had an interesting post in the NY Times earlier this month, "A Food Manifesto for the Future". I'll list his ideas below, but one of them strikes me of worth more than a quick perusal. It's the suggestion to break up the USDA... citing among other things their conflicting goals. He says, "...you can’t sell garbage while telling people not to eat it."

Mr. Bittman goes into more detail about each of these goals in his article linked above. As he says, they are goals frequently discussed in many places... but not implemented anywhere. Frankly, I personally doubt they ever WILL be as long as BigBusiness pulls the strings.... but they are reasonable, sustainable goals within our reach otherwise.

*End government subsidies to processed food.

*Begin subsidies to those who produce and sell actual food for direct consumption.

*Break up the U.S. Department of Agriculture and empower the Food and Drug Administration. "Currently, the U.S.D.A. counts among its missions both expanding markets for agricultural products (like corn and soy!) and providing nutrition education. These goals are at odds with each other; you can’t sell garbage while telling people not to eat it, and we need an agency devoted to encouraging sane eating."

*Outlaw concentrated animal feeding operations and encourage the development of sustainable animal husbandry.

*Encourage and subsidize home cooking.

*Tax the marketing and sale of unhealthful foods.

*Reduce waste and encourage recycling.

*Mandate truth in labeling.

*Reinvest in research geared toward leading a global movement in sustainable agriculture.


Photo from cambodia4kidsorg's photostream

I do get very tired of my voice not being heard, or perhaps heard but ignored... and I know I am not alone in the battle for real food.

Thursday, February 10, 2011

Curing Salt Pork

Pork Back Fat, covered with Cure, Day 1

I've been so disgusted at the rancid salt pork in the grocery stores in the last 2-3 years that I decided to make my own. It's actually easy!

I bought some pastured pork back fat from my meat supplier at the Farmer's market, and cut it into manageable chunks. Rather than make just a plain cured salt pork product for a pot of beans or greens, I decided to jazz it up a bit with some spices in the cure. Then when I smoke my bacon that's also curing, I'll smoke half the salt pork as well. I can imagine some recipes where the smoke flavor might be interesting, and I will smoke with apple chips since that's the flavor I want for my bacon.

If the salt pork turns out lousy, I will have lost only about $2 and some of my time! If it's good, it will be vacuum-sealed in small packages and go into the freezer. Since my investment is so small, I plan to put a couple of vacuum-packs of it out in the cool root cellar just to see how long it will keep fresh in there.

Here's my recipe, adapted from Charcuterie: The Craft of Salting, Smoking, and Curing
Total back fat weight, 1040g
Note: Salt, sugar and Cure #1 are based on the weight of the back fat!
Kosher salt, 35.8g
Dark Muscovada sugar, 17.9g
Cure #1, 3.89g
Cracked black pepper, 1 heaping tsp.
Bay leaves, 2 medium, torn
Quatre épices, 3/8 tsp.
Juniper berries, 1 tsp., crushed

I covered the back fat pieces with all the cure, being sure everything was thoroughly covered, and refrigerated it in a leak-proof container, as shown in the photo at the top. Every day I turned the pieces, making sure the cure was well distributed. 


After 7 days, it looks like this, and the basic recipe suggested 7-10 days to be fully cured. It probably has cured enough, as there is some resistance to finger-pressure, but I won't be ready to fire up the smoker until tomorrow or the next day due to high winds outside... so it goes back in the refrigerator for another day or two.


I fired up the cold smoker this morning with some apple wood, and smoked half the salt pork I had cured. Now it will get vacuum-packed and refrigerated for 2-3 weeks for the flavor to equalize throughout the pieces. Looks Yummy to me!


I relented, and "oven-roasted" part my salt pork until it reached an internal temp of 150ºF. Then it was vacuum-packed and frozen. I did this just as my homemade bacon was done, to assure it is not fully raw when freezing... esp. because I will be giving some of it away. It is STILL not fully cooked and needs to be cooked before eaten.


Tuesday, February 8, 2011

Attempting my First Hard Rind Cheese

It's time to put my money where my mouth is... as my father used to say. So I have some fresh milk in the refrigerator and plans to try to turn it into cheese. Last month I purchased several varieties of cheese cultures, which are now stored in my freezer. However, I'm not going to use any of them on this first attempt. 

For one thing, cheese cultures in small packets are quite expensive... although a couple of them can be cultured into larger quantities and stored frozen in cubes that will keep at least a month. But by the time I do that, my milk may have spoiled, so it's a project for another time.

Most of the recipes I've read call for either 2 gallons of milk, or 5 gallons, and I only have 1 gallon, so the amounts of cultures to use are confusing to me. Typically, a gallon of milk will make only about a pound of cheese, which is a fairly small chunk. I can see the advantage of starting with a larger quantity of milk, considering the time and effort involved... and the curing/drying process.

But... this is what I have to work with, so it is what it is. I'm using the recipe from here.

Day One


The milk, the Greek yogurt as a starter, and my new temp probe.


The recipe said to sterilize everything in boiling water, including strainer, pot and lid, and cheesecloth. I hung the strainer and cheesecloth to air dry.


I even sterilized my whisk, which I will use to stir in the yogurt starter.

 
The next step was to heat gently to 68ºF and blend in the inoculum, which was 2-3 teaspoons of fresh buttermilk OR 1/3 cup yogurt. I only had yogurt available, and it wasn't very fresh so I used 1/2 cup. What this inoculation with a bacterial starter does is add the milk fermenting bacteria make lactic acid, which lowers the pH so that the rennet will be able to act on the casein (milk proteins) in the milk.


Cover the pot and let it sit at room temps (68º-72ºF) overnight. 

Day 2
I warm the milk to 86ºF and add 1/4 of a rennet tablet dissolved in 1/4 cup of cold water. Stir well, cover and allow to rest UNDISTURBED for about an hour, then check for a clean break. It may take longer, depending on room temps, pH of the milk... and only God knows what else!


Not a "clean break"


Well, up to this point everything was just hunky-dory. The directions said the rennet should coagulate in a couple of hours. I kept checking about every hour and after 5-6 hours went online and read the directions again. Nope, I didn't do anything differently. Just by pure chance, I went on to read Dr. Fankhouser's instructions for the same cheese, but made with 5 gallons of milk. In it, he says to skim the cream, which is not stated in the one gallon instructions. Grrrrrrrr.


I don't know if that's what made the difference in my batch or not, but I could not discern a 'clean break' and finally went to bed.


The next morning I discovered the top layer was kinda creamy but underneath it felt more like coagulated protiens, and I could see some whey. I decided not to waste a gallon of milk at this point, and went ahead with cutting the curds. It was more like trying to cut runny butter as the curds had very little body.


Next. I cooked my curds by bringing the heat slowly up to 102ºF for a firmer cheese. I was to leave them at that temp until the mess (I really cannot call them curds!) solidified to what he described as the consistency of firm scrambled eggs. Mine never got any better than soft-scrambled eggs. Then I started to drain off the whey and proceed anyway...


I had some baker's salt on hand, which is a very fine-milled salt just like cheese salt. Recipe said to add 2 teaspoons and stir. I don't know if I should have gone by taste alone, but it's too late now. It is a bit salty, and I'm hoping the whey draining away will remove some of it. 

Next, put curds in cheesecloth and press to drain more whey.


I have the bamboo mat I use for rolling sushi as a drain under the mold, and it's in a jelly-roll sheet pan with edges to catch the whey. I'll keep an eye on it and drain as necessary.


Here's the mold with the "follower" sitting on top. I won't add weights via my homemade press just yet as there is so much whey... and the press will not fit IN the sheet pan.


After 2 hours, I have poured off 2 cups of whey from the sheet pan. The curd mass still is too soft to add any weight. When I do try, the cheesecloth/mass just squishes out the bottom of the mold.


I'm not giving up!


Later: My cheese seems to be doing just what it should, at least as far as how it looks. I was finally to put some weights on it after about 4 hours. Photo above shows it unwrapped. You can see the depression made by the folded-over cheesecloth.


I cut a new piece of muslin more to size, and re-wrapped it and inverting it in the mold.


Then back in the mold and weights added. That's a total of only 11 pounds, including the brick in the ziplock bag on top of the sugar canister. The cheese is still too soft to hold more weight without squishing out of the bottom. My press is a little unstable, which doesn't help. Unfortunately, I cannot do anything about it until it gets warmer and I can locate some parts out in the storage barn.


The Next Morning:
Well, I may be making cheese after all! There was some accumulated whey overnight, but hard to say how much since the house is so winter-dry and some had no doubt evaporated. I took the cheese out of the mold, washed the mat and tray, inverted the cheese back into the mold, and added more weights. That's 26 pounds on it in the photo.


Out of Mold for the Last time, Still Wrapped in Cheesecloth

Finishing:
The instructions say to unwrap the cheese, coat all over with salt, re-wrap in clean sterile cheesecloth, and refrigerate. It should be placed on a rack of some sort as it may weep for a few days. The clean cheesecloth needs to be changed daily as long as it continues to get wet from weeping.


Here it is, all 411 grams (almost a pound), now salted, wrapped in clean (boiled) cheesecloth, and ready to refrigerate!

WooHoo!!!


Note: When it stops weeping in the refrigerator, it will have developed a rind and should be waxed to prevent further moisture loss. I will take pictures and post about it then, which should be in about 2-3 weeks, according to the instructions.


Sunday, February 6, 2011

Insourcing Food

Gouda in process, Photo by grongar

Yes, I've decided that the right term for I'm doing now is... insourcing! I have officially withdrawn from outsourcing as much of my food as I possibly can.

So much of what I have eaten over my lifetime has come from "elsewhere". It used to be that "elsewhere" was somewhere else in my own country, where the seasonal temperatures were different than mine and they could grow things I couldn't, like Florida tomatoes during my northern winters. More and more, the "elsewhere" (outsourcing) is to a foreign country, for whatever reasons (which I suspect includes profit margins). I'm NOT opposed to a farmer in Chile or Honduras making a living although I suspect they are governed by large corporations to the extent they grow one crop only, and perhaps import much of their own food.There's something wrong with this picture.

I'm not overly concerned about the safety of foods from foreign countries, since the USDA seems to be keeping check on imports (and I try not to buy them anyway). I'm just trying to get away from outsourcing in general, and when I do buy food I don't grow, I prefer it to be local. 

My community has become extremely poor in the last few years; all the manufacturing that used to be here has been outsourced to Mexico, or maybe China. The once vibrant local small dairy operations closed, not to send their milk elsewhere, but shut-down entirely, because a small dairy with a small output could not afford the expensive equipment now required to meet government regulations for dairy products. (They now receive subsidies to not raise dairy cows, but I won't go there right now.)

The whole "Eat Local" movement was an excellent start of opening my eyes to the expense our outsourcing actually costs, and while you can say I'm committed to eating local, it's a bit more concentrated than that.

When I say I am insourcing, that means most of my food dollars will be not only be spent locally, but a lot of the end product will be done at home. It is unrealistic to think I can raise my own hog, beef, chicken, lamb... AND garden produce... as a single 70-year old woman with a limited income and living on a few steep rural acres. However, I intend to do as much insourcing right here at home as I can learn and manage to do.


While I may not be able to raise my own cow or pig, I can certainly buy big chunks of the beasties locally, and turn them into edible delicacies, like bacon, corned beef, salume and hams. I can buy a cow share for local milk (there actually are some still around) and turn it into cheese... perhaps not as good as some European cheese, but delicious and healthy never the less. I can eat well, for less. and have a clearer conscious.

Another thing I hope will happen out of my efforts: someone younger will be encouraged to start to learn these age-old techniques, and they won't be lost again.

Saturday, February 5, 2011

No Post.. I've got the Crud that's going around

Photo by uberculture

Sorry...but I'm pretty sick, first time in a long time. I have several projects partially completed (and partially written) but they are currently on hold since I feel like Crap. I suppose it is the virus my sis has been lugging around for about 3+ weeks... I had hoped to avoid it completely, but it snuck in behind my back and gained the upper hand after all.

I don't intend to be sick for long... I'm taking care of myself, getting plenty of rest and plenty of liquids. I've had my fill of chicken soup, plus a couple of Hot Toddies and my homemade elderberry cough/cold/flu syrup that actually makes me feel better whether it speed the cure or not.

I'm still working on my projects that are time-sensitive (can't be frozen, stored or somehow kept for later) but I have zero energy to post about them right now.

I'll be back soon.

Friday, February 4, 2011

Fine-Tuning Methods of Rendering Lard, Part 1

I have written before on rendering lard here and here (and tallow here), but I continue to fine-tune my process in order to produce a better quality lard. I'm okay with what I have done in the past, certainly a far better product that what you get (Bleck!) in the stores, but I know it can be better. There are two upgrades to my process here. The first is a return to stovetop rendering for better control.


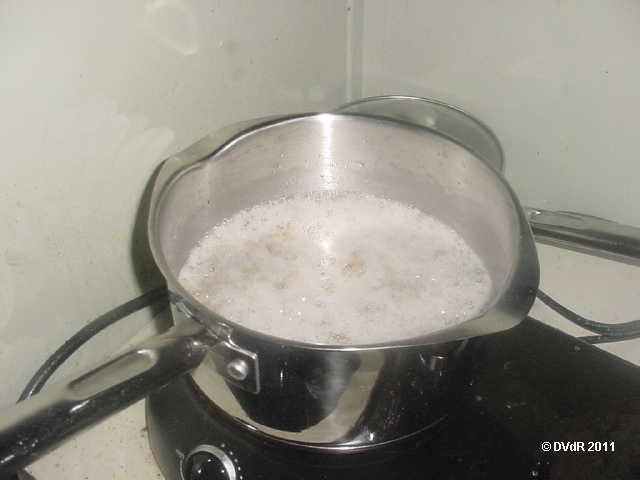
I have found that by using water in the bottom of the pot, and dicing smaller amounts at a time of pork fat into smaller cubes, I can use lower temps for rendering. This has the advantage of keeping the heated fat from taking on an over-cooked smell/taste. Shown above is almost a pound and a half of back fat in the pan, with about half a cup or less of water.


Once the water starts to barely boil, reduce the heat. As the water begins to cook off, it will make a froth on the surface.


As more water cooks off, you can see the fat pieces beginning to brown. At this point, you should start pouring off what fat has already rendered, to keep it from taking on a "cooked" flavor. With the pot shown above, I was side-tracked by the telephone so it all came out at one time. It was actually okay, partly because I chose to only render a small amount of fat.


Strain through a wire-mesh strainer. I didn't use any cheesecloth to line the strainer for the rendered lard above, but I did use a fine-mesh strainer. If you choose not to press the browned bits to get the remaining fat squeezed out, you will have some delicious cracklin's (or gribenes). Salt them and set them aside for snacking. I freeze some, and add a tablespoon or so to cooked dishes just before they are finished; they give almost any dish a subtle hint of some wonderful ingredient that's hard to pinpoint!

The rendered lard is very clear, with absolutely no hint or smell of overcooking.


The rendered lard cools to almost pure white overnight.

I was very pleased with this newest batch of pig back fat that I got from a different supplier of pastured pork. The smell from the get-go was cleaner, fresher... and it rendered much nicer, in my opinion. The technique might have a lot to do with it, too! Unfortunately, that farmer is now out of the pig business. (He sold all his pigs after they broke the fencing and destroyed his enormous garden.)


The next thing I did was to whip some of the rendered lard, a suggestion found on eGullet. Someone there said it makes a lovely creamy consistency. The photo above is after whipping briefly as it was slowly cooling, roughly at about 75ºF. It didn't make much difference, no increase in volume.

However, I've decided not to whip any more of it. Whipping incorporates air, which hastens oxidation. WHAT was I thinking? (Obviously I wasn't thinking or I wouldn't have done it at all!)


The second method I want to post about involves emulsifying, and it's too long to add to this post. Look for it in a week or three, when I've had time to make a batch and take photos.

Wednesday, February 2, 2011

Can Americans Cook?

Photo from thebittenword.com

Can Americans Cook? I see this question, in various forms, all over the internet... and actually I'm not sure what it really means, "cook". I must say I've eaten some very fine fare all over this country... and an abundance of dreck. My own plunge into real foods over the last year, and more recently into charcuterie, has shown me that I have far more to learn about cooking than I thought.

My 23 year old niece, who lives in this household, does what she calls "cooking" for herself and her mother. However, what she really does is heat food. As Michael Ruhlman says, "Heating isn't cooking. Heating heats. Cooking transforms!"

I grew up with the impression that French food/cooking was hifalutin' (haute bourgeois cuisine)... a concept absorbed growing up in the era of Swanson TV dinners and TV food marketing. In 1943 (when I was 3), there was a recipe for Apple Crisp Pronto, a concoction of packaged sliced white bread, margarine, honey and apples meant to help Rosie the Riveter get dinner on the table.

Now as I am starting to learn to make various charcuterie products, I have also been researching how to prepare them for the table. Let me tell you, it is an eye opener to see some of the thoughts about foods and cooking that have been lurking deep inside my head for many years!

So far I have cooked four of the five different kinds of sausages I made recently. Two were wonderful, and those were where I followed the recipe pretty closely. Two others have trashed after trying some in a meal, even though a bite was cooked and eaten as a trial patty before stuffing any of them. Those two were just not very flavorful, and I now believe it's partly because I cut down on the seasonings, thinking the amounts were overkill. That stems from my lack of experience in making sausage and knowing how flavors change over time, whether frozen or even refrigerated a day or two before cooking.

What the French (along with Spanish and Italian) countrysides provided was delicious food made from readily available, less expensive (or sometimes throw-away) items. It's not the expensive items that transform food (although truffles and caviar may, if you can afford them!). No, it's something else that transforms, and I'm searching for it... simple food prepared and presented with care and passion, and the elusive alchemy that fuels memorable meals.

Can you honestly tell me what the meat tastes like when you eat a BBQ sandwich (or even what kind of meat it is)? There's a current lawsuit against Taco Bell for false advertising, because their "seasoned beef" is less than 35% meat as required by the USDA. I bet those products are so covered in seasonings and/or sauces that no customer even notices there's almost no beef in them!

Photo from Naotakem's Photostream

What makes food taste delicious can be as simple as seasoning with spices and herbs, or marinating, and using delicate sauces... the attention to food preparation. (Of course, starting with quality food helps!) It takes Time, something many of us are unwilling or unable to expend on the task. We might miss Oprah! or NCSI... (someone should invent a font for sarcasm). It is just a mind-set about time, that's all. (The average American spends something like 15 minutes a day in the kitchen, and 3 hours in front of the TV.)

Time to prepare healthy, tasty food doesn't have to mean hours of drudgery in the kitchen. For example, the brined pork roast I wrote about recently took 10 minutes of my time to prepare the brine. The next day it took 15 minutes to brown the roast, turn on the oven, slice the onions and carrots and add some wine before covering it with foil. Then a few minutes to carve and serve later when it was cooked. That very small roast fed me for 5-6 meals, and took no more than half an hour of my actual time, spread over 2 days.

To be honest, some foods do take time to prepare, and I always have a learning curve where the preparation is even longer when it's a new food. I'm about to buy my first duck, which is expensive in this country.

There are many French recipes using duck. I realize now it's because they had them in their farmyards like we once had chickens, so they were cheap meat. A duck can provide many meals, and one use was putting the legs into a confit where they were covered with duck fat  in a crock, and stored in a cool place for several months. The famous cassoulet is nothing more than a slow cooked bean stew, with some sausage and duck or pork confit.

The bottom line was that to survive, those generations had to learn to preserve foods... all kinds of foods. In America during the last few years, home food preservation has increased dramatically, centered around home canning and dehydration. Probably many of us now have jars of homemade tomato sauce, jellies, jams and pickles on our pantry shelves, whereas 15 years ago it might have been unthinkable.

Charcuterie is simply a means of preservation, which was vitally important to the farmers and poorer classes of the populations in earlier times. (A confit like I mentioned above, is considered charcuterie.) Much charcuterie we know evolved in France and Italy because the climate was more moderate for curing things like olives, cheese, ham and salume. The charcuterie that evolved in say, Hungary or Poland, was quite different; they often smoked meats due to a colder climate, shorter seasons, and where the drying conditions were less favorable than in France, Spain or Italy. Regional charcuterie exists all over the world, in every culture because every culture needed to preserve foods.

In my opinion, the real key to the value of food preservation (besides economy, and the availability of food during possible disruption of electric and food transportation services) is how much we enjoy eating it later. (Make it tasty!)

I cannot tell you how many jars of some home-canned vegetable I have made and later thrown out because the taste was insipid and the texture just plain lousy. I'm getting better with learning how to adjust what happens to seasonings and textures during processing, but what's really important is that I have gained confidence in my home food preservation ability via canning and dehydrating to not poison myself... and now I'm ready to expand into meats other than home-canned.

That learned confidence about food safety makes me less afraid of killing myself (and friends) by preserving some meats. However, I cannot imagine a pantry full of jerky or pemmican, which are so easy to preserve. Sure, they qualify as preserved meats... but who wants a steady diet of jerky and pemmican?

So along with learning to make charcuterie, I want to look closer at French, Spanish and Italian countryside cooking for taste, and get over my learned bias. No, I will not be studying the foods of just those countries, but I'm starting there because there is so much written about them. I doubt I will ever be considered a cook, but hopefully I can learn to turn cheap cuts of meat into something tasty rather than merely edible.

I adore Julia Child, the towering Empress of the Kitchen, but truthfully have never attempted more than one or two of her recipes... and that was many years ago. However, I am told her book The Way to Cook teaches one to think about cooking, and that's something I really need to do!